
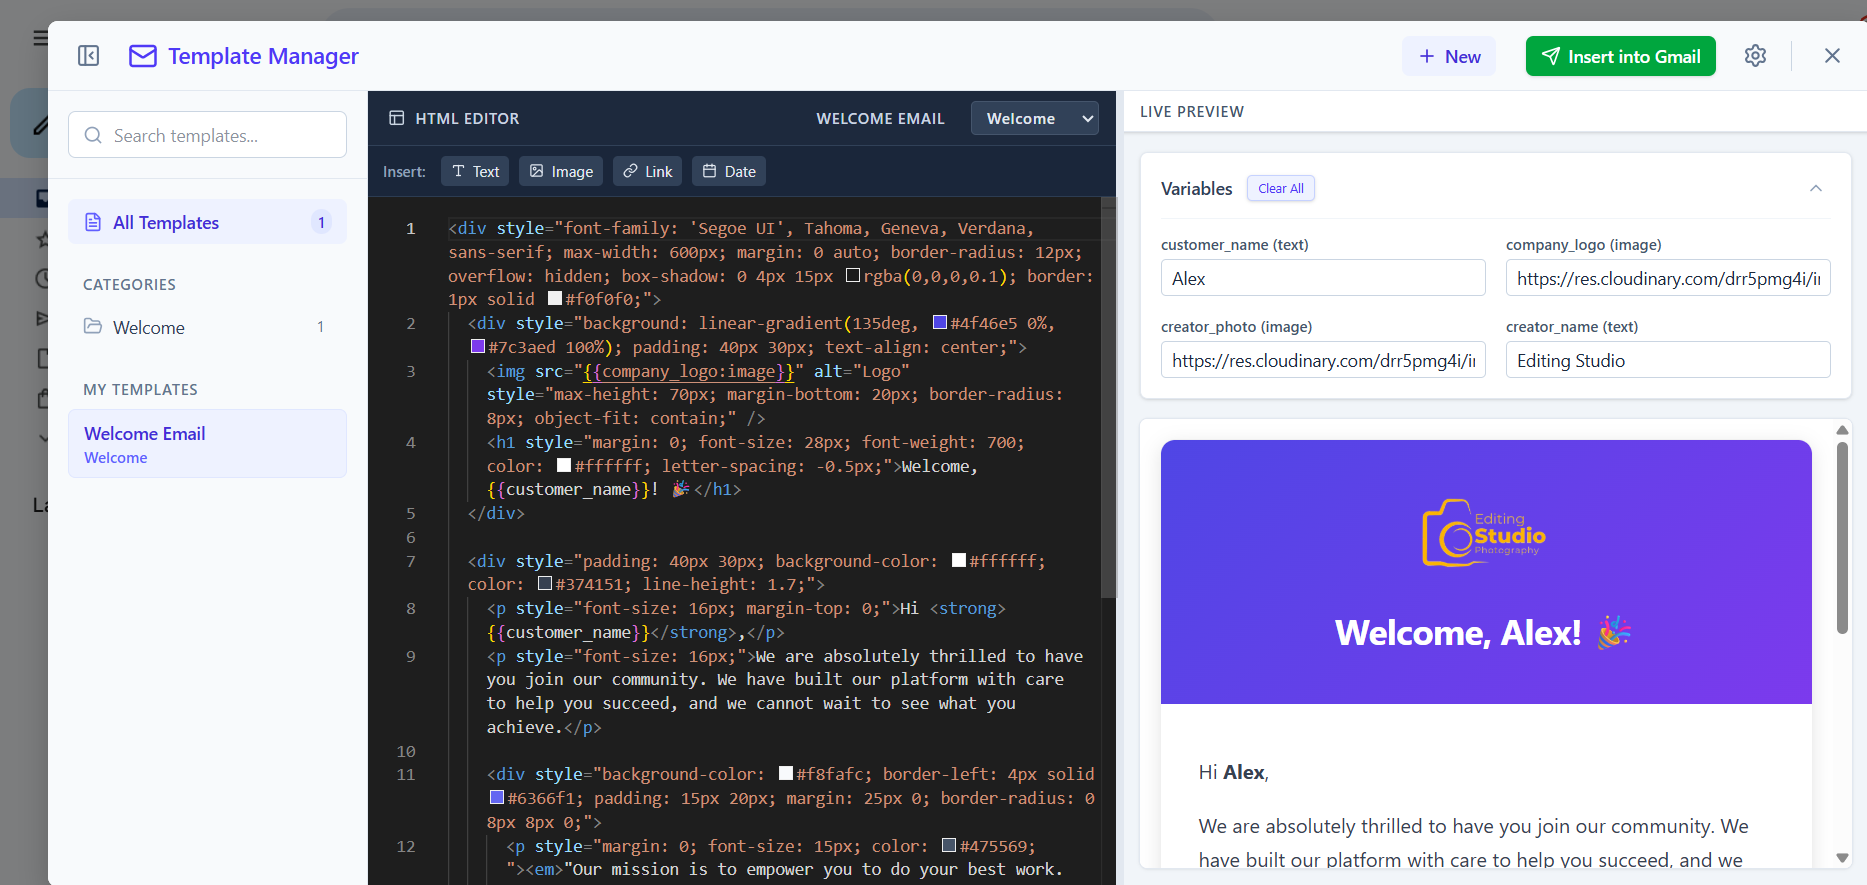
- Full-Screen Template Manager: A gorgeous, dedicated UI for managing all your templates.
- Live HTML Preview: See changes rendered instantly in real-time.
- Dynamic Variables: Easily inject text, images, files, and YouTube videos into your templates using a simple
{{varName}}syntax. - Smart Link Conversion: Paste any Google Drive link, and the extension instantly converts it into a direct download or view link!
- One-Click Gmail Insertion: Seamlessly inject your beautifully crafted HTML directly into the Gmail composer.
You can download the latest pre-compiled release directly from GitHub!
- Download the Latest Release
- Extract the downloaded ZIP file.
- Open Google Chrome and navigate to
chrome://extensions/. - Enable Developer mode (toggle in the top right corner).
- Click Load unpacked and select the extracted folder.
- Open Gmail: Compose a new email in Gmail.
- Launch the Manager: Click on the new "Templates" icon injected into your Gmail composer toolbar.
- Choose or Create a Template: Select one of the beautiful default templates from the left sidebar or click "+ New" to create your own from scratch.
- Edit the HTML: Write your email HTML in the code editor. Any updates will automatically reflect in the Live Preview panel.
- Add Variables: Sprinkle variables into your code using the
{{variable_name}}syntax. Input fields will automatically appear in the Live Preview panel! - Insert into Gmail: Once your preview looks perfect, click "Insert to Gmail" and watch the magic happen!
If you'd like to build the extension from source:
- Clone the repository and navigate into it:
git clone <your-repo-url>
cd HTML-Mail_sender
- Install dependencies:
npm install
- Run the development server (automatically rebuilds on changes):
npm run dev
When you're ready to share the extension, you can build production-ready packages:
-
Build the source files:
npm run build
-
Generate a ZIP file (For Chrome Web Store or manual unpacked loading):
Compress-Archive -Path dist\* -DestinationPath HTML-Mail_sender_Release.zip -Force -
Generate a CRX file (Command Line):
npx crx pack dist -o HTML-Mail_sender_Release.crx
Note: This will automatically generate a
key.pemfile if you don't have one. -
Generate a CRX file (Using Chrome UI):
- Open Google Chrome and go to
chrome://extensions/. - Ensure Developer mode is enabled (top right).
- Click the Pack extension button.
- For Extension root directory, browse and select the
distfolder inside your project. - For Private key file (optional), browse and select the
key.pemfile in your project folder (if you don't select one, Chrome will automatically create a newkey.pemfile for you). - Click Pack extension. Chrome will generate your
.crxfile right next to thedistfolder!
⚠️ Important Note onkey.pem: Always keep yourkey.pemsafe and secret, as it defines your extension's unique identity! Do not commit it to public repositories.Manual Key Generation (Optional): If you ever need to generate a private key manually (for example, if you are working on a public fork), you can use OpenSSL in your terminal:
openssl genrsa -out key.pem 2048
- Open Google Chrome and go to
Want to get started quickly? We have provided a few responsive, professional templates you can paste right into the editor.
Check out the temples folder in this repository for ready-to-use HTML code:
These templates automatically generate fields for you to easily fill in data using Dynamic Variables!
Developed by Sibam Devoloper