

A Home Assistant custom integration (HACS-ready) that turns free public data into handy sensors you can build dashboards and automations from. It is modular: you add the integration once for each little widget you want, pick what kind it is, and fill in your own settings. Everything works worldwide, driven by the location or parameters you enter.
Every source used here is free and needs no API key (NASA's picture of the day uses a shared demo key by default; you can add your own for higher limits).
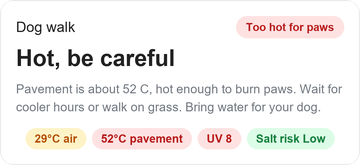
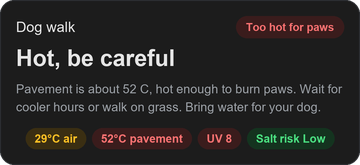
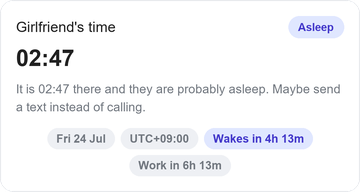
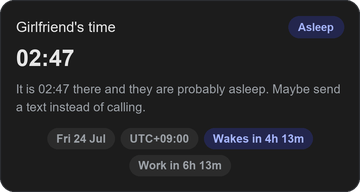
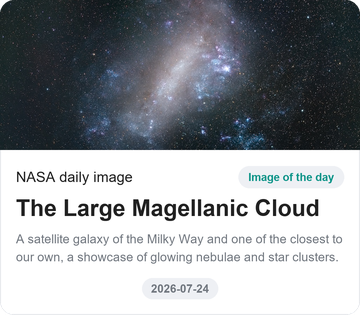
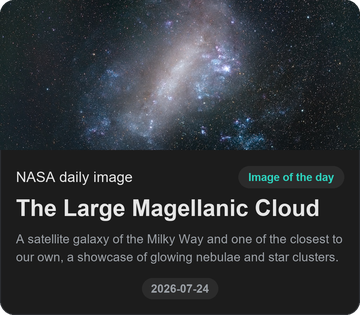
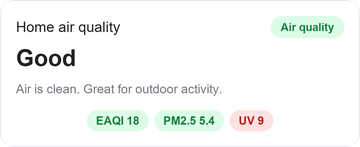
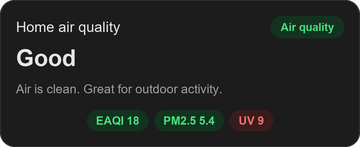
Sensible ships a card that shows each sensor richly: a category, the value, a short explanation, and fact chips. Here is what a few of them look like, in light and dark.
Dog paw safety (temperature, salt risk, the reason, and a tip):
World clock (add their bedtime, so it tells you if they are awake):
NASA image of the day (tap the card to open it full size):
Air quality (green when safe, red when not, per reading):
| Module | What the sensor shows | You configure |
|---|---|---|
| World clock | The current time somewhere, and optionally whether they are Awake or Asleep, with countdowns to wake-up, bedtime and work | A timezone, and optional bedtime / wake / work times |
| Dog paw safety | A verdict (Good to go / Warm / Too hot for paws / Cold, protect paws) from an estimated pavement temperature and cold or snow conditions | A location |
| Air quality | An air-quality verdict (Good to Extremely poor), with AQI, PM2.5, PM10 and UV in the attributes | A location |
| Sunrise and sunset | Today's daylight length, with sunrise, sunset and peak UV in the attributes | A location |
| Moon phase | The current moon phase and illumination (computed offline, no network) | Nothing |
| Fun fact | A random fun fact, refreshed through the day | Language |
| Daily image (NASA) | NASA's picture of the day, with the image as the entity picture | Optional NASA key |
| Currency exchange rate | The latest rate between two currencies (ECB data) | Base and target currency |
| Next public holiday | Your country's next public holiday and how many days away it is | Country code |
More curated modules are planned. If you want one that is specific to your country or city (a local river gauge, a transit feed), open an issue and it can be added.
- In Home Assistant go to HACS -> three-dot menu -> Custom repositories.
- Add the URL of this repository, category Integration, and click Add.
- Find Sensible in HACS, click Download, and restart Home Assistant.
Copy the custom_components/sensible folder into your Home Assistant
config/custom_components/ directory and restart.
- Go to Settings -> Devices & Services -> Add Integration -> Sensible.
- Give it a name and pick a sensor type.
- Fill in that type's settings (a timezone, a location, a currency pair, and so on).
- You get one sensor, named after what you entered, with a friendly state and rich attributes you can use in cards and automations.
Want several widgets? Add the integration again for each one. Every entry is
independent, so you might have sensor.dog_paw_safety, sensor.time_in_tokyo,
sensor.eur_to_usd, and more, all from Sensible.
- "Is it OK to walk the dog right now?" Add a Dog paw safety sensor for your
location, then automate: if its state is
Too hot for pawsat 5pm, send a notification. The attributes include the estimated pavement temperature and a short reason. - "Is my partner awake right now?" Add a World clock for their city and enter their bedtime and wake-up time; the sensor tells you Awake or Asleep.
- "Is the air OK for a run?" Add an Air quality sensor and gate your reminder on it.
Sensible ships a card that renders any of its sensors nicely (the screenshots
above). It is served automatically at /sensible/sensible-card.js.
Add it from Edit dashboard -> + Add Card -> Sensible Card. It has a visual editor: pick your sensor from the dropdown (no need to know its entity id) and toggle the parts you want. As YAML it is just:
type: custom:sensible-card
entity: sensor.dog_walk
What is my entity id? It comes from the name you gave the instance, not a fixed value. Named it "Dog walk" ->
sensor.dog_walk; named it "Girlfriend" ->sensor.girlfriend. Use the editor's dropdown, or look under Developer Tools -> States. (If the card ever cannot find your entity, it now lists the Sensible sensors it did find so you can copy the right id.)
If you only have one Sensible sensor you can leave out entity and it will find
it. If the card shows "Custom element doesn't exist", add the resource manually:
Settings -> Dashboards -> three-dot menu -> Resources -> Add resource, URL
/sensible/sensible-card.js, type JavaScript Module, then hard-refresh.
Card options
| Option | Default | What it does |
|---|---|---|
entity |
auto-detect | Which Sensible sensor to show. |
title |
entity name | Header text. |
show_name |
true |
Show the header row (name and chip). Set false for a bare value. |
show_image |
true |
Show the picture (for example the NASA image). |
show_detail |
true |
Show the explanation line. |
show_chips |
true |
Show the fact chips. |
max_chips |
0 (all) |
Show at most this many chips. |
open_on_tap |
true |
Open the linked page on tap (for example the NASA image). |
Some examples per sensor:
Dog paw safety, compact (just the headline and the two key numbers):
type: custom:sensible-card
entity: sensor.dog_walk
title: Dog walk
show_detail: false     # hide the long explanation
max_chips: 2           # only show the first two chips
World clock, just the time and status (no chips):
type: custom:sensible-card
entity: sensor.girlfriends_time
title: Girlfriend
show_chips: false
NASA image, picture only (no header, no chips), opens full size on tap:
type: custom:sensible-card
entity: sensor.nasa_daily_image
show_name: false
show_chips: false
open_on_tap: true
You can also just use standard Home Assistant cards: the state and attributes work
in an Entities or Glance card, and the NASA thumbnail shows via entity_picture.
You set these in the Add integration dialog (not YAML); the card just displays the result. A few examples:
-
World clock:
Timezone(e.g.Asia/Tokyo), and optionally theirBedtime(23:00),Wake-up time(07:00), andWork time(09:00). With those it shows Awake or Asleep and counts down to waking, bedtime, and work. Leave any of them blank to skip that part.Which times do I enter? Always their local times, in the timezone you picked, not yours. If she is in Tokyo and goes to bed at 23:00 Tokyo time, pick
Asia/Tokyoand enter23:00. The card then shows her current local time and works out Awake or Asleep for you, so you never have to do the maths in your head. -
Dog paw safety: a
LatitudeandLongitude(pre-filled with your home). -
Air quality, Sunrise and sunset: a location.
-
Daily image (NASA): an optional API key.
-
Currency exchange rate:
BaseandTargetcurrency. -
Next public holiday: a
Country code. -
Moon phase: nothing to configure.
Change any of it later via Settings -> Devices & Services -> your sensor -> Configure.
Each entry is one sensor:
- State is the headline value (a verdict, a time, a rate, a title, a fact).
- Attributes carry the details (for example, the paw sensor exposes
air_temp_c,estimated_pavement_c,uv_index,salt_risk,reason, andtip; the card readscategory,detail, andfacts). - Where it makes sense the thumbnail is exposed (the NASA image), so standard Home Assistant cards show it too.
- Estimates are estimates. The paw-safety pavement temperature is derived from air temperature and solar radiation, so treat it as guidance rather than a measured value.
- Be a good citizen. These are free, shared services. The default update intervals are conservative on purpose.
- Weather and air data come from Open-Meteo, facts from uselessfacts, images from NASA APOD, rates from Frankfurter, and holidays from Nager.Date. Thanks to all of them.
Licensed under the MIT License.