
 ██████╗██╗   ██╗██████╗ ███████╗██████╗ ███████╗██████╗  █████╗  ██████╗███████╗
██╔════╝╚██╗ ██╔╝██╔══██╗██╔════╝██╔══██╗██╔════╝██╔══██╗██╔══██╗██╔════╝██╔════╝
██║      ╚████╔╝ ██████╔╝█████╗  ██████╔╝███████╗██████╔╝███████║██║     █████╗
██║       ╚██╔╝  ██╔══██╗██╔══╝  ██╔══██╗╚════██║██╔═══╝ ██╔══██║██║     ██╔══╝
╚██████╗   ██║   ██████╔╝███████╗██║  ██║███████║██║     ██║  ██║╚██████╗███████╗
 ╚═════╝   ╚═╝   ╚═════╝ ╚══════╝╚═╝  ╚═╝╚══════╝╚═╝     ╚═╝  ╚═╝ ╚═════╝╚══════╝
This is a Commandline Client for the social network platform Cyberspace. It is currently in an alpha state.
At present, this client has solid basic functions and presentation, but lacks the full functionality of the website version. You can browse your feed and notifications, write posts and replies as well as write, edit and publish notes.
Please note: You need to have API access permissions enabled on your account to use this client. Currently supporters have API access enabled by default, and select users have it manually enabled by @genghis_khan. The limitation is to protect the server from uncought security flaws and risk of excessive requests.
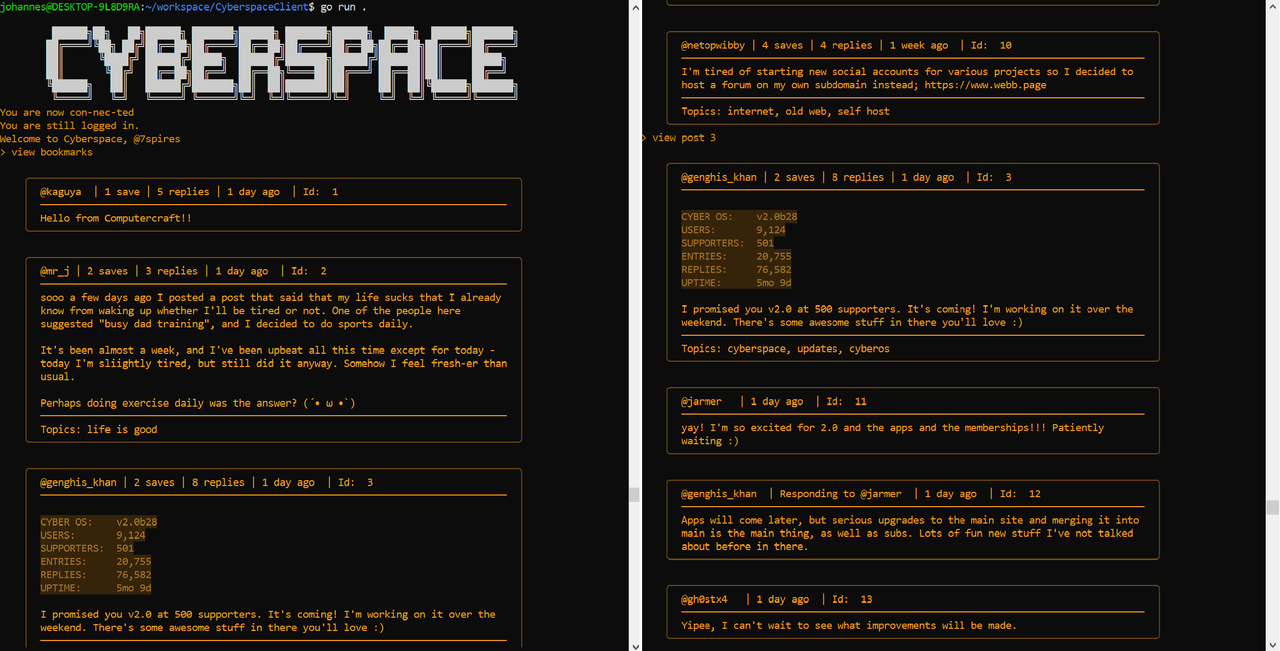
This assumes you already have a Go itself installed. If you do not, refer to this page this page before returning.
So long as you have the client installed, you can simply clone the Git (git clone github.com/johannesalke/cyberspacecli) repo onto your machine (or download it via github), then while inside the project directory execute the following commands:
go build -o cyberspacecli .
./cyberspacecli
The first comiles the program, the second executes it. (To exit, use the command 'exit' or press the keys ctrl+C.)
If you like what you see and want to have the tool available anywhere on you machine (as opposed to just inside this folder) you can also install it as a command line tool. You can then use it as easily as you would git or vim. For that, see the following instructions:
go install github.com/johannesalke/cyberspacecli
Client commands consist of a verb and a noun.
view feed (optional_arg): Load 10 posts from the feed, starting at the newest. Every time the command is used, 10 more are loaded starting from where the previous iteration stopped. In the feed, posts are truncated at 1000 characters. To see the whole post, use the 'view post' command. Use the optional argument 'new' to load posts made since you started the client without losing the marker of the basic command. Use 'reset' to start over entirely. (Sometimes it may show less than 10 because NSFW posts are currently filtered by default. In the future, this will be handled based on user settings.)view post <post_id>: This command shows the post specified by the id argument, plus the first 20 comments.view notifications (optional_arg): Load 15 notifications. If the notification is for a post or reply, you can use the shown id to open that post. Supports the same optional arguments as 'view feed'view notes: Loads 10 notes from your journal.view bookmarks: Load 10 bookmarks. Due to current API limitations, only bookmarked posts can be displayed, but not bookmarked replies.view profile <username>: Displays a simplified version of that users profile, as well as their pinned post if they have one. Use 'me' as the username to see your own profile.write post: Opens your default text editor (or if you have non, nano (use ctrl+s, ctrl+x to exit)) and lets you write a post. Be aware that it might fail to post, so don't invest too much effort into it without copying the contents elsewhere before saving and closing the editor. After closing the editor, you'll have a chance to choose topics for the post.write reply <target_id>: Write a reply to the post or reply whose id you gave. Will ask for final confirmation before posting.write note: Same as 'write post', but your writing is put in your journal instead.edit note <note_id: Opens a note in your default text editor (if none, nano/notepad) and lets you edit it.publish <note_id>: Posts a note to the feed, making it visible to other users.edit config: This lets you edit the client's config file. If you set 'stay logged in' to true, the client will save your refresh token and you will remain logged in across sessions. The config file should be in your .config/ or Library/Application Support/ directories, depending on whether you use linux or apple.bookmark <target_id: Bookmarks the post or reply whose id was given as an argument.delete <target_id>: This command deletes replies, posts, notes or bookmarks. The type of the target doesn't need to be specified, if will be inferred from the id. You will be asked to confirm intent to delete.help: Prints instructions to the console.logout: Log out of your account and exit the client. You will need to enter your email and password again the next time.exit: Exit without logging out
The client doesn't work on Windows, because it uses traits of the Linux terminal to format the output & edit documents.. The client does not have full functionality on windows. You can browse the feed with minimal visual artifacts, but it won't automatically format the color like on mac/linux, meaning you would have to set that manually in the terminal settings.
If you run Windows, I can quickly reccomend two ways of circumventing these limitations: Install WSL, an official Linux subsystem for Windows, or use a different client. From conversation with the dev, I know that cyberspace user @Ragnar's TUI client works just fine on windows due to having a different technological foundation. You can find it here.
The client doesn't support pure keyboard navigation, as people will still need to use a mouse/trackpad to scroll up and down the terminal output history to browse e.g. 'view feed' output. Supposedly this can be circumvented with Fn + ↑ / ↓ on mac and Shift + PageUp / PageDown on Windows/Linux, but if at all, that only works on some versions. Personally, I managed to scroll up and down in windows 10 Powershell via Ctrl + ↑ / ↓, but the same didn't work in WSL Ubuntu.