This project has been created as part of the 42 curriculum by zotaj-di, baelgadi.


cub3D is a textured raycasting engine inspired by Wolfenstein 3D , written in C with MiniLibX. The mandatory binary cub3D reads a .cub scene file, opens a window, and renders a 1st person view using a DDA raycaster.
The bonus binary cub3D_bonus adds an entire game with 3 floors, enemies, weapons, sliding doors, sprites, a circular minimap, cutscenes, mission briefings, a HUD, endgame screens and mouse-look. See Chapter 20 for the full feature list and the story manual.

The bonus binary is the full game and the recommended way to try the project:
git clone https://github.com/L3awdMan/Cub3D.git
cd Cub3D
make bonus
./cub3D_bonus maps/bonus/blake_stone_floor1.cub
Other campaign maps live under maps/bonus/: blake_stone_floor2.cub, blake_stone_floor3.cub, demo.cub.
Note
MiniLibX is vendored under ./mlx/ and builds automatically as part of make — no manual setup needed.
    make            # builds the mandatory binary ./cub3D
    make bonus      # builds the bonus binary    ./cub3D_bonus
    make re         # full rebuild
    make clean      # remove object files
    make fclean     # remove object files and binaries
make and make bonus are independent: building the bonus does not touch
the mandatory tree and vice versa.
    ./cub3D_bonus maps/bonus/blake_stone_floor1.cub  # bonus: the full game
    ./cub3D       maps/good/subject.cub              # mandatory: raycaster only
The maps/ folder is organised to make the evaluator's life easier.
maps/
├── good/   valid maps, must all open and render
├── bad/    invalid inputs for whatever reason
└── bonus/  Blake Stone parody, use only with ./cub3D_bonus
Every file here must launch the engine, render, and quit cleanly on ESC or red-cross.
| File | What it covers |
|---|---|
subject.cub |
Reference map from the subject |
room_shambles.cub |
Small enclosed room |
example.cub |
Basic, used in README for explanations |
player_north.cub / player_south.cub / player_east.cub / player_west.cub |
One per start orientation |
with_spaces.cub |
Irregular shape with leading spaces |
order_shuffled.cub |
Texture / colour identifiers given in arbitrary order |
large.cub |
Larger map |
Note
Any .cub file is accepted as long as it follows the subject's format.
Each file targets a single subject failure case.
Identifiers / config
| File | Failure |
|---|---|
missing_no.cub |
No NO texture |
missing_f.cub |
No F floor colour |
duplicate_no.cub |
NO declared twice |
duplicate_f.cub |
F declared twice |
unknown_id.cub |
Identifier XX not recognised |
texture_missing.cub |
SO line has no path |
texture_nonexistent.cub |
NO points to a file that doesnt exist |
RGB
| File | Failure |
|---|---|
rgb_missing_component.cub |
Only 2 components |
rgb_too_many.cub |
4 components |
rgb_negative.cub |
Negative value |
rgb_over_255.cub |
Value > 255 |
rgb_non_digit.cub |
Non numeric component |
rgb_empty_component.cub |
F 220,,0 |
Map
| File | Failure |
|---|---|
not_closed.cub |
Wall cell replaced by 0 |
hole_via_space.cub |
Space embedded inside a wall opens the map |
no_player.cub |
Map has no N/S/E/W |
multi_player.cub |
Map has 2 player starts |
invalid_char.cub |
Map contains X |
empty_file.cub |
Zero byte file |
no_map.cub |
No map block. |
element_after_map.cub |
Extra F line after the map |
map_before_config.cub |
Map appears before the texture / color block |
wrong_extension.txt |
Not a .cub file |
These belong on the command line, not in a map:
./cub3D                              # no argument
./cub3D maps/good/subject.cub extra  # too many arguments
./cub3D maps/does_not_exist.cub      # nonexistent file
./cub3D maps/good # path is a directory# Test every bad map at once
for f in maps/bad/*.cub maps/bad/*.txt; do
printf "%-40s " "$f"
./cub3D "$f" 2>&1 | tr '\n' ' '
echo
done
# Every good map must open a window (Launch + kill after 1s)
for f in maps/good/*.cub; do
echo "───── $f ─────"
timeout 1 ./cub3D "$f"
done./cub3D_bonus maps/bonus/blake_stone_floor1.cub

Bocal Blaster: Peer to Feer
"★★★★★ A revolutionary peer-to-peer experience.
I was assigned a 0 by Moulinette X and I have never felt more alive." — GameStud
"This Game Really Makes You Feel Like Batman" — IGL
"Bocal Blaster sets a new standard for the genre.
The raycasting is so smooth I forgot I had a defense in 4 hours." — The Stud Critic
"I have not slept in three days. Send help." — Anonymous 42 Student
"10/10. Goated." — 42chan
| Key | Mandatory | Bonus |
|---|---|---|
W / A / S / D |
Move | Move |
← / → |
Rotate view | Rotate view |
| ESC | Quit | Quit |
| Window ✕ | Quit | Quit |
| Mouse motion | Rotate view | |
| Left click | Fire weapon | |
| SPACE | Fire weapon | |
| E | Open / close a door | |
| BACKSPACE | Back (in menu) |
- Lode Vandevenne - Raycasting tutorial
- Ray-casting tutorial series by F. Permadi
- id Software - Wolfenstein 3D source
- Blake Stone: Aliens of Gold

Caution
The explanations in this repository are not intended to encourage cheating or any behavior that goes against 42's rules. Their purpose is to support the peer-to-peer learning system, which is also one of the core ideas behind our game. Bader and I do not encourage, support, or take responsibility for any form of cheating related to this repository.
Important
If you have read our explanations carefully, you will understand that they are not enough on their own .. you still need to do your own research.
- Chapter 1: What even IS Cub3d?
- Chapter 2: How the program runs
- Chapter 3: Project structure
- Chapter 4: The .cub file format
- Chapter 5: Data structures
- Chapter 6: main.c - Where it all begins
- Chapter 7: Parsing (reading the .cub file)
- Chapter 8: Map validation
- Chapter 9: Player initialization
- Chapter 10: The Math foundations (Trigonometry refresher)
- Chapter 11: Vectors, Cameras, and Rays
- Chapter 12: The DDA Algorithm (finding walls)
- Chapter 13: Rendering (from maths to pixels)
- Chapter 14: Texture mapping (making walls look real)
- Chapter 15: The game loop, 60 frames per second
- Chapter 16: Event handling (keyboard input)
- Chapter 17: Movement
- Chapter 18: Rotation
- Chapter 19: Cleanup
- Chapter 20: Bonus
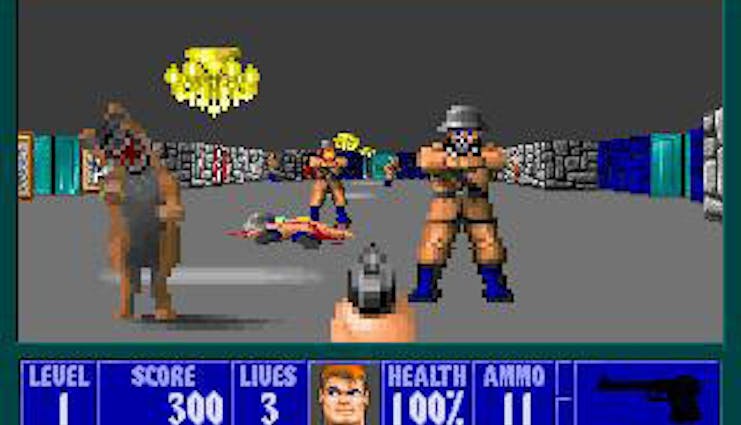
In 1992, id Software released Wolfenstein 3D, one of the first ever first-person shooters. The game looked 3D, but it was actually running on computers that were far too slow to do real 3D graphics. The trick? Raycasting.

Raycasting creates the illusion of 3D by drawing a 2D world from a first-person perspective. The world is actually a flat 2D grid (like a chess board seen from above), but the engine makes it look like you're walking through 3D corridors.
Cub3d is a miniature recreation of the Wolfenstein 3D engine. It:
- Reads a
.cubmap file that describes a maze - Opens a window on your screen
- Draws the maze from a 1st person perspective using raycasting
- Lets you walk around with WASD and look around with arrow keys
- Updates the view ~60 times per second so it feels smooth
You're standing in a maze, shooting a laser beam from your eye straight ahead. That beam will eventually hit a wall. The closer the wall, the taller it appears. The farther the wall, the shorter it appears.
Now visualize yourself shooting 1280 laser beams (1 for each pixel column of your screen) For each beam:
- Calculate how far away the wall is
- Draw a vertical stripe of wall that's tall if the wall is close, short if it's far
This is raycasting. 1280 vertical stripes creating the illusion of 3D.

Here's the complete execution flow, from start to finish:
./cub3D maps/good/subject.cub
        │
        ▼
  ── main() ────────────────────────────────────────────────────────────────────

     1. cub_init(&cub)         ← Zero out all memory
     2. parse_file(&cub, path) ← Read .cub file
        ├── check_extension()  ← Verify it's a .cub file
        ├── read lines with get_next_line()
        ├── parse_texture()    ← Read texture paths
        ├── parse_color()      ← Read floor/ceiling colors
        ├── store_map_lines()  ← Read the grid
        └── validate_map()     ← Check walls + find player
     3. init_mlx(&cub)         ← Open window + create buffer
     4. load_textures(&cub)    ← Load 4 wall textures
     5. register_hooks(&cub)   ← Wire up keyboard events
     6. mlx_loop(cub.mlx)      ← START THE INFINITE LOOP
        │
        └──► loop_hook() runs ~60 times per second:
             ├── apply_movement()    ← Move if WASD held
             ├── apply_rotation()    ← Turn if arrows held
             ├── update_horizon()    ← Update head bob
             └── render_frame()      ← Draw everything
                 ├── cast_all_rays() ← 1280 rays
                 │   └── for each column x (0..1279):
                 │       ├── init_ray()         ← Set up ray
                 │       ├── init_step_side()   ← DDA setup
                 │       ├── run_dda()          ← Find wall
                 │       └── draw_wall_stripe() ← Draw column
                 │           ├── draw_ceiling()
                 │           ├── draw_tex_col()
                 │           └── draw_floor()
                 ├── draw_crosshair() ← HUD cross
                 └── mlx_put_image_to_window()  ← Push buffer

     7. cub_destroy(&cub)      ← Free everything (on exit)

  ──────────────────────────────────────────────────────────────────────────────
Cub3d/
├── include/
│   ├── cub3d.h          ← ALL data structures + ALL function prototypes
│   └── keys.h           ← Keyboard key codes
│
├── src/
│   ├── main.c           ← init → parse → open window → run loop
│   ├── cleanup.c        ← Memory freeing, error handling, exit
│   │
│   ├── parsing/         ← Everything related to reading the .cub file
│   │   ├── parse_file.c      ← Opens file, reads lines, dispatches to parsers
│   │   ├── parse_elements.c  ← Parses "NO ./path" texture lines
│   │   ├── parse_colors.c    ← Parses "F 100,100,100" color lines
│   │   ├── parse_map.c       ← Reads the grid of 0s and 1s
│   │   ├── validate_map.c    ← Checks walls surround all walkable cells
│   │   └── init_player.c     ← Sets player position/direction from spawn char
│   │
│   ├── execution/       ← The raycasting math
│   │   ├── raycaster.c       ← Main loop: cast 1280 rays, DDA stepping
│   │   └── ray_utils.c       ← Ray initialization, distance calculation, texture selection
│   │
│   ├── render/          ← Drawing pixels to the screen
│   │   ├── render.c          ← Game loop hook, pixel writing function
│   │   ├── draw_wall.c       ← Textured wall column drawing
│   │   ├── draw_bg.c         ← Floor and ceiling solid-color drawing
│   │   ├── texture.c         ← Loading XPM texture files, reading texture pixels
│   │   └── shade.c           ← Shading
│   │
│   └── events/          ← User input handling
│       ├── hooks.c           ← Register keyboard/window events with MLX
│       ├── movement.c        ← WASD movement with collision detection
│       └── rotation.c        ← Left/right arrow rotation
│
├── textures/            ← Wall texture images (XPM format)
├── maps/                ← Map files (.cub)
├── libft/
├── mlx/                 ← MiniLibX library (not bundled)
└── Makefile
A .cub file has two sections: configuration lines and a map grid.
Here's an example (maps/good/example.cub):
NO ./textures/north.xpm       North facing wall texture
SO ./textures/south.xpm       South facing wall texture
WE ./textures/west.xpm        West facing wall texture
EA ./textures/east.xpm        East facing wall texture

F 100,100,100                  Floor color (R=100, G=100, B=100) = gray
C 50,50,80                     Ceiling color (R=50, G=50, B=80) = dark blue

  111111111111111111            The map grid
 110000000W0000000011           W = player spawn facing West
1110000000000000000111
 11000001111100000011
  111111111111111111
| Element | Meaning | Example |
|---|---|---|
NO |
Texture for north-facing walls | NO ./textures/north.xpm |
SO |
Texture for south-facing walls | SO ./textures/south.xpm |
WE |
Texture for west-facing walls | WE ./textures/west.xpm |
EA |
Texture for east-facing walls | EA ./textures/east.xpm |
F |
Floor color as R,G,B | F 100,100,100 |
C |
Ceiling color as R,G,B | C 50,50,80 |
All 6 elements must appear exactly once and before the map
| Char | Meaning |
|---|---|
1 |
Wall (rays bounce off it) |
0 |
Empty floor (walkable space) |
(space) |
Void / outside the map |
N |
Player spawn facing North |
S |
Player spawn facing South |
E |
Player spawn facing East |
W |
Player spawn facing West |
Note
N, S, E and W count as walkable.
- The map must be completely enclosed by walls (
1). No walkable cell (0,N,S,E,W) can be adjacent to a space or the edge of the grid. - There must be EXACTLY one player spawn.
- Lines can be of different lengths: short lines are treated as having spaces at the end.
Every data structure is defined in include/cub3d.h.
typedef struct s_img
{
    void    *id;        // MLX's internal handle for this image
    char    *data;      // Pointer to the raw pixel buffer in memory
    int     bpp;        // Bits per pixel (always 32 on modern systems)
    int     line_len;   // Number of BYTES per row (may include padding)
    int     endian;     // Byte order: 0 = little-endian (x86 is always this)
    int     width;      // Image width in pixels
    int     height;     // Image height in pixels
}   t_img;
Why does this exist? MiniLibX gives us a raw block of memory that represents an image.
To write a pixel at position (x, y), we need to know:
- Where the memory starts (
data) - How many bytes per pixel (
bpp / 8= 32 / 4 = 4 bytes = anunsigned int) - How many bytes per row (
line_len)
> How pixel addressing works: (not mandatory to know but useful to better visualize)

line_len is not always 4 (because of padding), but let's say here it is, so:
Address pixel (120, 320) is simply data + (320 * 4) + (120 * 4)
This struct is used for 2 things:
- The screen buffer (
cub->img) 1280×720 - Wall textures (
cub->tex[0..3]) loaded from XPM files
typedef struct s_player
{
    double  pos_x;      // X position in the grid
    double  pos_y;      // Y position in the grid
    double  dir_x;      // X component of look direction
    double  dir_y;      // Y component of look direction
    double  plane_x;    // X component of camera plane
    double  plane_y;    // Y component of camera plane
}   t_player;
The position is in floating-point grid coordinates.
If the player is at (3.5, 7.5), they're in the center of the cell at column 3, row 7.
The direction vector is a unit vector (length = 1.0) pointing where the player is looking.
The camera plane is perpendicular to dir and defines the Field of View. These are explained visually in Chapter 11.
typedef struct s_map
{
    char    **grid;         // Array of strings. grid[y][x] gives the cell
    int     width;          // Maximum row length (widest row)
    int     height;         // Number of rows
    char    *tex_path[4];   // File paths: [0]=north, [1]=south, [2]=west, [3]=east
    int     floor_col;      // Floor color packed as 0x00RRGGBB
    int     ceil_col;       // Ceiling color packed as 0x00RRGGBB
    int     parsed_flags;   // Bitmask tracking which elements have been parsed
}   t_map;
parsed_flags uses a bitmask to track which of the 6 required elements have been found:

Color packing: a color like R=100, G=100, B=100 is stored as one integer:
0x00RRGGBB = (100 << 16) | (100 << 8) | 100 = 0x00646464
typedef struct s_ray
{
    double  dir_x;          // This ray's direction X
    double  dir_y;          // This ray's direction Y
    int     map_x;          // Current grid cell X being checked
    int     map_y;          // Current grid cell Y being checked
    double  side_dist_x;    // Distance along ray to next vertical grid line
    double  side_dist_y;    // Distance along ray to next horizontal grid line
    double  delta_x;        // Distance along ray to cross one full grid cell (X)
    double  delta_y;        // Distance along ray to cross one full grid cell (Y)
    double  perp_dist;      // Perpendicular distance from player to wall hit
    int     step_x;         // Direction to step in X: +1 (right) or -1 (left)
    int     step_y;         // Direction to step in Y: +1 (down) or -1 (up)
    int     side;           // Which axis was crossed: 0=vertical, 1=horizontal
}   t_ray;
This is a temporary struct, created for each of the 1280 screen columns.
Every field is explained in detail in Chapter 12.
typedef struct s_draw
{
    int     height;     // Total height of the wall stripe in pixels
    int     start;      // First pixel row to draw (0 if wall goes above screen)
    int     end;        // Last pixel row to draw (719 if wall goes below screen)
    int     tex_x;      // Which column of the texture to sample
    double  step;       // How many texture pixels to advance per screen pixel
    double  pos;        // Current position within the texture (floating point)
} t_draw;typedef struct s_cub
{
void *mlx; // MLX library context (returned by mlx_init)
void *win; // The window handle
t_img img; // The screen buffer (1280×720)
t_img tex[4]; // The 4 wall textures [NO, SO, WE, EA]
t_player player; // Player position/direction/camera
t_map map; // The entire world data
int keys[65536]; // Key state: keys[keycode] = 1 if held, 0 if not
int horizon; // Head bob vertical center (for shading)
double bob_t; // HEad bob phase (for shading)
int parse_fd; // Parser fd (-1 when not parsing)
} t_cub;Why
horizon/bob_t: the renderer uses these to drop the horizon by a few pixels on each footstep Whyparse_fd: to prevent the fd from leaking when an invalid map aborts mid parsing
(the parser stashes the open.cubso thatcub_destroy()canclose()it on any error path)
This struct holds the entire state of the program. It's passed by pointer to nearly every function.
The keys[65536] array is a trick for keyboard input: instead of handling movement in the key event handler, we just set keys[119] = 1 when W is pressed and keys[119] = 0 when it's released. Then in the game loop, apply_movement() checks if (cub->keys[KEY_W]) for smooth, continuous movement.
Note
This is necessary because if the user presses the W key for example, we want to keep advancing until the key is released, instead of advancing by chunks
#define WIN_W       1280    // Window width in pixels (number of rays cast)
#define WIN_H       720     // Window height in pixels
#define MOVE_SPD    0.05    // How far the player moves per frame (in grid units)
#define ROT_SPD     0.03    // How much the player rotates per frame (radians)
#define FLAG_ALL    63      // 0b00111111 = all 6 config elements parsed
#define COLLISION   0.2     // Used for wall collision
#define TEX_COUNT   4       // NO / SO / WE / EA
#define FOG_K       6.0     // Walls reach minimum brightness at 6 cells
#define SIDE_SHADE  0.55    // N/S walls are 45% darker than E/W
#define BG_FADE     0.45    // Floor and ceiling gradient floor
#define BOB_AMP     5       // Head bob amplitude in px
#define BOB_STEP    0.18    // Head bob phase increment (per moving frame)
And in keys.h:
#define KEY_W       119     // ASCII value of 'w'
#define KEY_A       97      // ASCII value of 'a'
#define KEY_S       115     // ASCII value of 's'
#define KEY_D       100     // ASCII value of 'd'
#define KEY_LEFT    65361   // X11 keycode for left arrow
#define KEY_RIGHT   65363   // X11 keycode for right arrow
#define KEY_ESC 65307 // X11 keycode for Escapeint main(int ac, char **av)
{
t_cub cub;
if (ac != 2)
{
ft_putstr_fd("Error\nUsage: ./cub3D <map.cub>\n", 2);
return (1);
}
cub_init(&cub);
parse_file(&cub, av[1]);
init_mlx(&cub);
load_textures(&cub);
register_hooks(&cub);
mlx_loop(cub.mlx);
cub_destroy(&cub);
return (0);
}t_cub cub;
Declare the main struct on the stack: it's about 262KB (mainly due to the keys[65536] array).
cub_init(&cub)
Zero the entire struct with ft_bzero to set all pointers to NULL and all numbers to 0.
This is important for safety: cub_destroy() will check for NULL before freeing, so if parsing fails half way, only the things that were allocated get freed.
parse_file(&cub, av[1])
Read and validate the .cub file. After this, the map, textures paths, colors, and player are all set up.
init_mlx(&cub)
Initialize the graphics system:
cub->mlx = mlx_init();                                        // Connect to X11
cub->win = mlx_new_window(cub->mlx, WIN_W, WIN_H, "cub3d");   // Create window
cub->img.id = mlx_new_image(cub->mlx, WIN_W, WIN_H);          // Allocate buffer
cub->img.data = mlx_get_data_addr(cub->img.id, &cub->img.bpp, // Get pixel pointer
		&cub->img.line_len, &cub->img.endian);
mlx_loop(cub.mlx)
This is the infinite loop.
MLX takes over and checks for events and calls our loop_hook() function.
This function never returns during normal operation.
Parsing is the most code heavy part of the program
void	parse_file(t_cub *cub, char *path)
{
	int		fd;
	char	*line;

	check_extension(cub, path);          // Verify .cub extension
	fd = open(path, O_RDONLY);           // Open for reading
	line = get_next_line(fd);
	while (line)
	{
		if (line[0] != '\n')
			dispatch_line(cub, line, &fd);  // Dispatch to correct parser
		free(line);
		if (cub->map.grid)
			break ;                       // Map read = done
		line = get_next_line(fd);
	}
	drain_gnl(fd);                       // Drain leftover GNL buffers
	close(fd);
	validate_map(cub);                   // Validation
}
dispatch_line() identifies each line:
- Lines starting with
NO,SO,WE,EA→parse_texture() - Lines starting with
ForC→parse_color() - Lines with map characters (
0,1, spaces, spawns) →store_map_lines() - Anything else → error
drain_gnl()
After reading, get_next_line could have leftover data.
We read and free lines until EOF to prevent memory leaks.
void	parse_texture(t_cub *cub, char *line, int idx)
{
	...
	if (cub->map.parsed_flags & (1 << idx))        // Already parsed?
		exit_error(cub, "Duplicate texture identifier");
	path = skip_to_path(line, idx);                  // Skip "NO " prefix
	trimmed = ft_strtrim(path, " \t\n\r");           // Clean whitespaces
	cub->map.tex_path[idx] = trimmed;                // Store
	cub->map.parsed_flags |= (1 << idx);             // Mark as parsed
}
The bitmask (1 << idx) checks/sets the appropriate bit for each texture index (0-3).
Parses lines like "F 100,100,100":
- Split by comma using
ft_split(line, ',') - Validate exactly 3 parts (each between 0 and 255)
- Pack into one integer:
(r << 16) | (g << 8) | b

store_map_lines() reads all map lines and builds the grid as a dynamic array.
append_row() grows the grid by 1 at each time:
- Allocate a new array with 1 more slot
- Copy all existing string pointers (the strings themselves don't move)
- Adds the new string pointer
- Free the old array

A map is valid if and only if:
- Every walkable cell is completely enclosed by walls
- There is exactly one player spawn
For every walkable cell, check all 8 surrounding cells. If any neighbor is out of bounds, a space, or beyond the end of a shorter row, the map is "open" and invalid.

Why 8 neighbors instead of 4? To catch diagonal leaks:

The implementation iterates dy from -1 to +1 and dx from -1 to +1, skipping the center (0,0).
For each neighbor, it checks:
- Is the row index in bounds?
- Is the column index within that row's length?
- Is the character a space?
Complexity: O(W × H)
When validate_map() finds a spawn character, it calls init_player():
void	init_player(t_cub *cub, int y, int x, char c)
{
	cub->player.pos_x = (double)x + 0.5;     // Center of the cell
	cub->player.pos_y = (double)y + 0.5;     // Center of the cell
	cub->player.dir_x = 0;
	cub->player.dir_y = 0;
	cub->player.plane_x = 0;
	cub->player.plane_y = 0;
	if (c == 'N' || c == 'S')
		set_dir_ns(&cub->player, c);
	else
		set_dir_we(&cub->player, c);
}- The direction vector is a unit vector (length always = 1)
- The camera plane must be perpendicular to the direction
If the direction vector and the camera plane have the same length (so camera plane's length = 1), the FOV (field of vision) will be 90°:

If the camera plane is larger than the direction vector, the FOV will be larger than 90° and we will have a wider vision, like zooming out:

We will go with camera plane length 0.66 for ~66° FOV (like Wolfenstein 3D).
When the player rotates, the camera rotates and both the direction vector AND the plane vector have to be rotated:

Since they rotate with the same values, the perpendicularity remains.
Oh and btw...
Note
To verify perpendicularity
2 vectors are perpendicular when their dot product is 0:
dir⋅plane = (dir.x) * (plane.x) + (dir.y) * (plane.y)
| Spawn | dir | plane | Perpendicular check |
|---|---|---|---|
| N | (0, -1) | (0.66, 0) | 0 × 0.66 + (-1) × 0 = 0 ✓ |
| S | (0, 1) | (-0.66, 0) | 0 × (-0.66) + 1 × 0 = 0 ✓ |
| E | (1, 0) | (0, 0.66) | 1 × 0 + 0 × 0.66 = 0 ✓ |
| W | (-1, 0) | (0, -0.66) | (-1) × 0 + 0 × (-0.66) = 0 ✓ |
Before diving into raycasting, let's make sure the trigonometry is crystal clear.
Draw a circle with radius 1 (the "unit circle"). Pick any angle a measured from the positive X axis. The point where the angle meets the circle has coordinates:
- X coordinate = cos(a)
- Y coordinate = sin(a)

So when we rotate a vector by angle a, the tip travels along the circle:

This is the mathematical foundation of everything.

The player's look direction is a unit vector (length 1.0). It tells us which way the player is facing.
Since the length is always 1.0:
"1 unit of travel along this vector = 1 unit of distance."
Reminder that the camera plane is a vector perpendicular to the direction.
It's an imaginary line segment in front of the player, stretching across their field of view.

The FOV is calculated using basic trigonometry (with arctangent):
half_FOV = atan(|plane| / |dir|) = atan(0.66 / 1.0) = 33.4°
total_FOV = 2 × 33.4° ≈ 66.8°
This matches the classic Wolfenstein 3D field of view at around 66°.
To cast a ray for screen column x (0 to 1279):
camera_x = 2.0 * x / 1280.0 - 1.0      // Maps screen column to [-1, +1]
ray_dir = dir + plane * camera_x         // Interpolate across camera plane
This maps:
- Column 0 →
camera_x = -1.0(far left of screen) - Column 640 →
camera_x = 0.0(center of screen) - Column 1279 →
camera_x = +1.0(far right of screen)

A ray direction vector like (0.6, 0.8) means:
For every 1 unit of ray travel, it moves 0.6 cells right and 0.8 cells down
This decomposition is the foundation of the DDA algorithm

For the DDA algorithm, we need to know: how far does a ray travel to cross one full grid cell?
delta_x = |1 / ray_dir_x|     (distance to cross one cell in X)
delta_y = |1 / ray_dir_y|     (distance to cross one cell in Y)
Why |1 / ray_dir_x|?
Let's take for example a ray going in direction (0.6, -0.8).
Its X component is 0.6, meaning that for every 1 unit of ray travel, X advances 0.6 units.
To advance X by 1 full unit (one grid cell), the ray must travel 1 / 0.6 = 1.667 units.
Edge case: If ray_dir_x = 0 (ray is perfectly vertical), it will NEVER cross a vertical grid line.
We use 1e30 (a very VERY large number) instead of infinity. (because with infinity we can run into problems)

Remember: delta values are constant for a given ray.
Once computed, the gap between every vertical crossing is exactly always delta_x, and between every horizontal crossing is exactly delta_y
DDA (Digital Differential Analyzer) is a grid traversal algorithm.
We have a ray starting at the player's position going in some direction. We need to find the first wall cell it hits.
We could check every 0.001 units along the ray, but that's slow and imprecise...
DDA instead jumps from grid line to grid line, never missing a cell.
void	init_ray(t_ray *ray, t_player *p, int x)
{
	double	camera_x;

	camera_x = 2.0 * x / WIN_W - 1.0;
	ray->dir_x = p->dir_x + p->plane_x * camera_x;
	ray->dir_y = p->dir_y + p->plane_y * camera_x;
	ray->map_x = (int)p->pos_x;         // Player's exact grid cell X
	ray->map_y = (int)p->pos_y;         // Player's exact grid cell Y
	// ... compute delta_x and delta_y
}step_x and step_y: Which direction to move through the grid (+1 or -1).
side_dist_x and side_dist_y: The distance from the player to the first grid line in each direction.
For example, let's take the player at pos = (3.7, 2.3), looking right and down:

static void	run_dda(t_ray *ray, t_map *map)
{
	while (1)
	{
		if (ray->side_dist_x < ray->side_dist_y)
		{
			ray->side_dist_x += ray->delta_x;
			ray->map_x += ray->step_x;
			ray->side = 0;                    // Crossed a vertical line
		}
		else
		{
			ray->side_dist_y += ray->delta_y;
			ray->map_y += ray->step_y;
			ray->side = 1;                    // Crossed a horizontal line
		}
		// Handle invalid / out of bound cell
		if (map->grid[ray->map_y][ray->map_x] == '1')
			break ;                            // Hit a wall!
	}
}
At each step, we will compare side_dist_x and side_dist_y.
Whichever is smaller is the next grid line the ray crosses. So we step to that cell and check if it's a wall.
If not, we add the corresponding delta and repeat.


The side variable is crucial, as it tells us which axis the ray crossed when it hit the wall. This determines:
- Which texture to use (N/S for horizontal hits, E/W for vertical hits)
- How to calculate the perpendicular distance
After DDA, we now know which cell was hit and which side. We need distance to calculate wall height.
❌ The wrong approach: Euclidean distance from player to hit point.
ray->perp_dist *= sqrt(ray->dir_x * ray->dir_x + ray->dir_y * ray->dir_y);
This causes a "fish-eye" effect where walls curve outward at screen edges.

✅ The right approach: Perpendicular distance projected onto the player's forward direction. This makes walls appear straight.
if (ray->side == 0)
    ray->perp_dist = ray->side_dist_x - ray->delta_x;
else
    ray->perp_dist = ray->side_dist_y - ray->delta_y;

Why subtract delta?
During the DDA loop, side_dist was incremented to point one cell PAST the hit.
Subtracting delta backs it up to the actual wall.
	dw->height = (int)(WIN_H / ray->perp_dist);
	dw->start = -dw->height / 2 + WIN_H / 2;    // Clamped to 0
dw->end = dw->height / 2 + WIN_H / 2; // Clamped to WIN_H - 1- Wall 1 unit away: height = 720 / 1 = 720 pixels (fills the screen)
- Wall 2 units away: height = 720 / 2 = 360 pixels (half the screen)
- Wall 10 units away: height = 720 / 10 = 72 pixels (small)
Screen height = 720, center = 360

For a wall strip of height 400:
  start = -400/2 + 360 = 160
  end   =  400/2 + 360 = 560

For a very close wall (height 2000):
  start = -1000 + 360 = -640 → clamped to 0
  end   =  1000 + 360 = 1360 → clamped to 719
void	put_px(t_img *img, int x, int y, unsigned int color)
{
	char	*px;

	if (x < 0 || y < 0 || x >= WIN_W || y >= WIN_H)
		return ;
	px = img->data + (y * img->line_len + x * (img->bpp / 8));
	*(unsigned int *)px = color;
}
Just like fractol!
>Why not use mlx_pixel_put()?
Because it's catastrophically slow, as each call makes an X11 system call.
For 1280×720 = 921,600 pixels per frame!!! Instead, we write to a memory buffer and push the entire image in ONE system call.
Each column is split into three parts:

	t->id = mlx_xpm_file_to_image(cub->mlx, path, &t->width, &t->height);
	t->data = mlx_get_data_addr(t->id, &t->bpp, &t->line_len, &t->endian);
After this, we can read texture pixels with the same data + (y * line_len + x * bpp/8) formula used for the screen buffer.

If we hit a vertical wall (side = 0), the X coordinate of the hit is exactly on a grid line (an integer).
So the interesting coordinate is Y: its fractional part tells us where along the wall face we hit.
Vice versa for horizontal walls.
if (ray->side == 0)
	wall_x = p->pos_y + ray->perp_dist * ray->dir_y;  // Use Y for vertical walls
else
	wall_x = p->pos_x + ray->perp_dist * ray->dir_x;  // Use X for horizontal walls
wall_x -= floor(wall_x);  // Keep only fractional part [0.0, 1.0]
Then map to texture pixel column:
tex_x = (int)(wall_x * tex->width);Without correction, adjacent walls facing opposite directions would show the texture mirrored:

if (ray->side == 0 && ray->dir_x > 0) // ray going right, hitting west face
	tex_x = (tex->width - 1) - tex_x; // flip

if (ray->side == 1 && ray->dir_y < 0) // ray going up, hitting south face
tex_x = (tex->width - 1) - tex_x; // flipdw.step = (double)tex->height / (double)dw.height; // Texture pixels per screen pixel
dw.pos = (dw.start - WIN_H/2 + dw.height/2) * dw.step; // Starting texture YFor each pixel in the wall stripe:
- Convert
dw->posto an integer texture row (tex_y) - Read the pixel color from the texture at
(tex_x, tex_y) - Write it to the screen buffer
- Advance
dw->posbydw->step
int	select_texture(t_ray *ray)
{
	if (ray->side == 0)                // Vertical wall
	{
		if (ray->step_x < 0)
			return (TEX_WE);         // Ray going left → west face
		return (TEX_EA);             // Ray going right → east face
	}

	if (ray->step_y < 0)             // Ray going up → north face
		return (TEX_NO);
	return (TEX_SO);                 // Ray going down → south face
}
The naming follows the direction the wall faces, not the player's direction.
After mlx_loop(), MLX enters an infinite event loop. Every iteration:
- Process any pending X11 events (key press, key release, window close)
- Call the loop hook function (our
loop_hook()) - Repeat
int	loop_hook(void *param)
{
	t_cub	*cub;

	cub = (t_cub *)param;
	apply_movement(cub);        // Step 1: Update player position
	apply_rotation(cub);        // Step 2: Update player direction
	render_frame(cub);          // Step 3: Draw everything
	return (0);
}
Every single frame:
- Check if WASD keys are held → move the player
- Check if arrow keys are held → rotate the player
- Cast 1280 rays & draw the scene
- Push the image buffer to the window
static void	render_frame(t_cub *cub)
{
	cast_all_rays(cub);
	mlx_put_image_to_window(cub->mlx, cub->win, cub->img.id, 0, 0);
}
cast_all_rays() iterates over every screen column, running:
init_ray()       → Set up ray direction and deltas
init_step_side() → Set up DDA parameters
run_dda()        → Step through grid until wall
draw_wall_stripe() → Draw ceiling + wall + floor for current column
After all 1280 columns, mlx_put_image_to_window() copies the entire buffer to the screen in one X11 call.
void	register_hooks(t_cub *cub)
{
	mlx_hook(cub->win, 2, 1L << 0, key_press, cub);     // KeyPress
	mlx_hook(cub->win, 3, 1L << 1, key_release, cub);   // KeyRelease
	mlx_hook(cub->win, 17, 0, close_hook, cub);          // Window X button
	mlx_loop_hook(cub->mlx, loop_hook, cub);             // Every frame
}
X11 Event numbers:
2=KeyPressa key was pressed down3=KeyReleasea key was released17=DestroyNotifythe window's close button was clicked
int	key_press(int key, void *param)
{
	t_cub	*cub;

	cub = (t_cub *)param;
	if (key >= 0 && key < 65536)
		cub->keys[key] = 1;       // Mark as "currently held down"
	if (key == KEY_ESC)
		close_hook(param);         // ESC = quit immediately
	return (0);
}
Why an array instead of handling movement directly?
As explained above (somewhere), if we moved the player inside key_press() pressing W would move the player exactly once.
For smooth continuous movement:
key_presssetskeys[KEY_W] = 1(just a flag)key_releasesetskeys[KEY_W] = 0- Every frame
apply_movement()checks:if (cub->keys[KEY_W] == 1)→ move
This gives a smooth movement that continues while the key is held.
static int	can_move(t_map *map, double x, double y)
{
	int	map_x;
	int	map_y;

	map_x = (int)x;
	map_y = (int)y;
	if (map_y < 0 || map_y >= map->height)
		return (0);
	if (map_x < 0 || map_x >= (int)ft_strlen(map->grid[map_y]))
		return (0);
	if (map->grid[map_y][map_x] == '1')
		return (0);
	return (1);
}
simply converts the floating position to grid coordinates and checks if that cell is a wall.
void	apply_movement(t_cub *cub)
{
	if (cub->keys[KEY_W])
		move_along(cub, cub->player.dir_x, cub->player.dir_y, 1);
	if (cub->keys[KEY_S])
		move_along(cub, cub->player.dir_x, cub->player.dir_y, -1);
	if (cub->keys[KEY_A])
		move_along(cub, cub->player.plane_x, cub->player.plane_y, -1);
	if (cub->keys[KEY_D])
		move_along(cub, cub->player.plane_x, cub->player.plane_y, 1);
}
(Explaining the differences in parameters for move_along below, just roll with it)
static void	move_along(t_cub *cub, double vx, double vy, int sign)
{
	double	nx;
	double	ny;

	nx = cub->player.pos_x + sign * vx * MOVE_SPD;
	ny = cub->player.pos_y + sign * vy * MOVE_SPD;
	if (can_move(&cub->map, nx, cub->player.pos_y))    // Check X
		cub->player.pos_x = nx;
	if (can_move(&cub->map, cub->player.pos_x, ny))    // Check Y;
		cub->player.pos_y = ny;
}
X and Y are checked separately.
This is what gives us wall sliding. (when you try moving on both axes but you're in front of a wall and you just slide along)
Without separate checks:
  Player wants to move diagonally into a corner
  → Can't move at all (destination is in a wall)
  → Player gets stuck

With separate checks:
  Player wants to move diagonally into a corner
  → X movement blocked (wall in the way)
  → Y movement allowed (can slide along the wall)
  → Player slides smoothly along the wall
And now to explain why the different parameters, I'll directly replace the values inside move_along
static void	move_along(t_cub *cub, double cub->player.dir_x, double cub->player.dir_y, int sign)
{
	double	nx;
	double	ny;

	nx = cub->player.pos_x + sign * cub->player.dir_x * MOVE_SPD;
	ny = cub->player.pos_y + sign * cub->player.dir_y * MOVE_SPD;
	if (can_move(&cub->map, nx, cub->player.pos_y))    // Check X
		cub->player.pos_x = nx;
	if (can_move(&cub->map, cub->player.pos_x, ny))    // Check Y;
		cub->player.pos_y = ny;
}
vx / vy are replaced with the dir coordinates.
This is because when we advance forward or backward, we advance in the DIR direction.

With sign = 1 we advance forward and with sign = -1 backward.
static void	move_along(t_cub *cub, double cub->player.plane_x, double cub->player.plane_y, int sign)
{
	double	nx;
	double	ny;

	nx = cub->player.pos_x + sign * cub->player.plane_x * MOVE_SPD;
	ny = cub->player.pos_y + sign * cub->player.plane_y * MOVE_SPD;
	if (can_move(&cub->map, nx, cub->player.pos_y))    // Check X
		cub->player.pos_x = nx;
	if (can_move(&cub->map, cub->player.pos_x, ny))    // Check Y;
		cub->player.pos_y = ny;
}
vx / vy are replaced with the camera plane coordinates.
This is because when we strafe to the left or to the right, we advance PERPENDICULAR to the DIR direction. (and it just happens that plane is always perpendicular to dir)

With sign = 1 we advance to the right and with sign = -1 to the left.
Little trigonometry refresher in Chapter 10.
To rotate a 2D vector by angle a:
static void	rotate_vectors(t_player *p, double angle)
{
	double	old_dir_x;
	double	old_plane_x;
	double	cos_a;
	double	sin_a;

	cos_a = cos(angle);
	sin_a = sin(angle);
	old_dir_x = p->dir_x;
	p->dir_x = old_dir_x * cos_a - p->dir_y * sin_a;
	p->dir_y = old_dir_x * sin_a + p->dir_y * cos_a;
	old_plane_x = p->plane_x;
	p->plane_x = old_plane_x * cos_a - p->plane_y * sin_a;
	p->plane_y = old_plane_x * sin_a + p->plane_y * cos_a;
}
Why save old_dir_x?
Because we need the original X value to compute the new Y.
If we overwrite dir_x first, then the dir_y calculation would use the wrong value
Both dir and plane must be rotated together in order to keep them perpendicular.
Rotation preserves angles, so they always stay at 90°.
void	apply_rotation(t_cub *cub)
{
	if (cub->keys[KEY_LEFT])
		rotate_vectors(&cub->player, -ROT_SPD);    // Left = negative angle
	if (cub->keys[KEY_RIGHT])
		rotate_vectors(&cub->player, ROT_SPD);     // Right = positive angle
}
ROT_SPD = 0.03 radians per frame ≈ 1.72° per frame.
At 60 FPS a full 360° would turn around 3.5 seconds.
(Classic shit)
void	exit_error(t_cub *cub, char *msg)
{
	ft_putstr_fd("Error\n", 2);
	ft_putendl_fd(msg, 2);
	cub_destroy(cub);
	exit (1);
}
This can be called at any point because cub_init() zeroed everything.
cub_destroy() can safely check each pointer for NULL.
void	cub_destroy(t_cub *cub)
{
	free_textures(cub);                             // 1. Destroy texture images
	if (cub->img.id && cub->mlx)
		mlx_destroy_image(cub->mlx, cub->img.id);  // 2. Destroy screen buffer
	if (cub->win && cub->mlx)
		mlx_destroy_window(cub->mlx, cub->win);    // 3. Destroy window
	if (cub->mlx)
	{
		mlx_destroy_display(cub->mlx);              // 4. Disconnect from X11
		free(cub->mlx);                             // 5. Free MLX context
	}
	if (cub->map.grid)
		free_grid(&cub->map);                       // 6. Free map strings
	free_tex_paths(&cub->map);                      // 7. Free texture paths
}
Order matters:
Textures and images reference cub->mlx so they must be freed before MLX itself.
Map data is independent of MLX and comes last.
If parsing fails before init_mlx(), all MLX cleanup is skipped.
The bonus is its own game built on top of the mandatory engine. If you only care about the raycaster logic, stop at Chapter 19.
The cub3D_bonus binary plays a tribute to Blake Stone: Aliens of Gold
(Apogee, 1993) another game based on Wolfenstein 3D.
Three floors, mission briefings, animated cutscenes between levels, an inventory of weapons, doors that slide open, enemies with AI and projectiles, a circular minimap, a HUD, a death/win screen, and mouse-look.
None of this changes the mandatory raycaster and the bonus code lives entirely under src_bonus/.
Story manual (comic): ./bocal_blaster.pdf
Interactive feature guide: open bonus_explained/index.html in a browser.
| Subsystem | Source folder | What it does |
|---|---|---|
| Mouse look | src_bonus/bonus/input/ |
Cursor is hidden / re-centred each frame |
| Circular minimap | src_bonus/bonus/minimap/ |
Rotating minimap (~108 px) |
| Sliding doors | src_bonus/bonus/doors/ |
Map cell D becomes an animated door. Opens on use (E), closes on its own |
| Sprites & enemies | src_bonus/bonus/entities/ |
Animated sprites for pickups and enemies |
| Enemy AI | src_bonus/bonus/entities/enemy_ai_bonus.c |
Enemy behaviour |
| Projectiles | src_bonus/bonus/projectiles/ |
Per projectile speed and texture |
| Weapons & hitscan | src_bonus/bonus/weapons/ |
5 selectable weapons |
| Damage / heal / reward FX | src_bonus/bonus/effects/ |
Full screen flashes when taking damage, healing + Fade timings |
| HUD (bar, lives, ammo) | src_bonus/bonus/hud/ |
Bottom of screen health/ammo bar and lives counter (LIVES_MAX = 23) |
| Cutscenes | src_bonus/bonus/cutscenes/ |
XPM frame sequences (CUT_MAX_FRAMES = 122) played at floor start / end. Skippable |
| Menu, difficulty, mission UI | src_bonus/bonus/ui/ |
Title screen, difficulty selection (EASY / SKILLED / GIGACHAD), mission briefing, end screen "RETRY / QUIT" |
| Floor switching & restart | src_bonus/bonus/progression/ |
Multilevel state. End of floor → cutscene → next mission briefing → next map. Restart resets the world |
| Bonus texture pipeline | src_bonus/bonus/system/ |
Loads / frees the Blake Stone texture pack (textures/blake_stone_xpm/) |
The bonus parser accepts every mandatory .cub element plus a couple of
extras:
Da door cell (acts like0for the player but is rendered as a sliding door).- Solid wall variants: alternate Blake Stone wall textures alongside
1(render with different XPM)4wall variant A (WALL_ALT0_PATH)5wall variant B (WALL_ALT1_PATH)6wall variant C (WALL_ALT2_PATH)
- Enemy / NPC spawns
2regular enemy (according to the current floor)3boss (according to the current floor)Ascientist enemyBpod alienFfluid alien
Zmarks the boss room tiles- Weapon pickups (Walking over a pickup tile swaps the active weapon & the tile clears)
7weapon 2 pickup8weapon 3 pickup9weapon 4 pickupPweapon 5 pickup
Cub3D badge © @Cadets for Cadets — used under MIT License.