
- Add the library dependency
-
Add a configuration file
Currently, you can set up your app with dev tools directly from the code or using a YAML or JSON Schema Draft-07 configuration file. The example will be based on YML; however, using other sources is not hard.
You can check the supported dev tools and configuration sources for more information.
So, create a
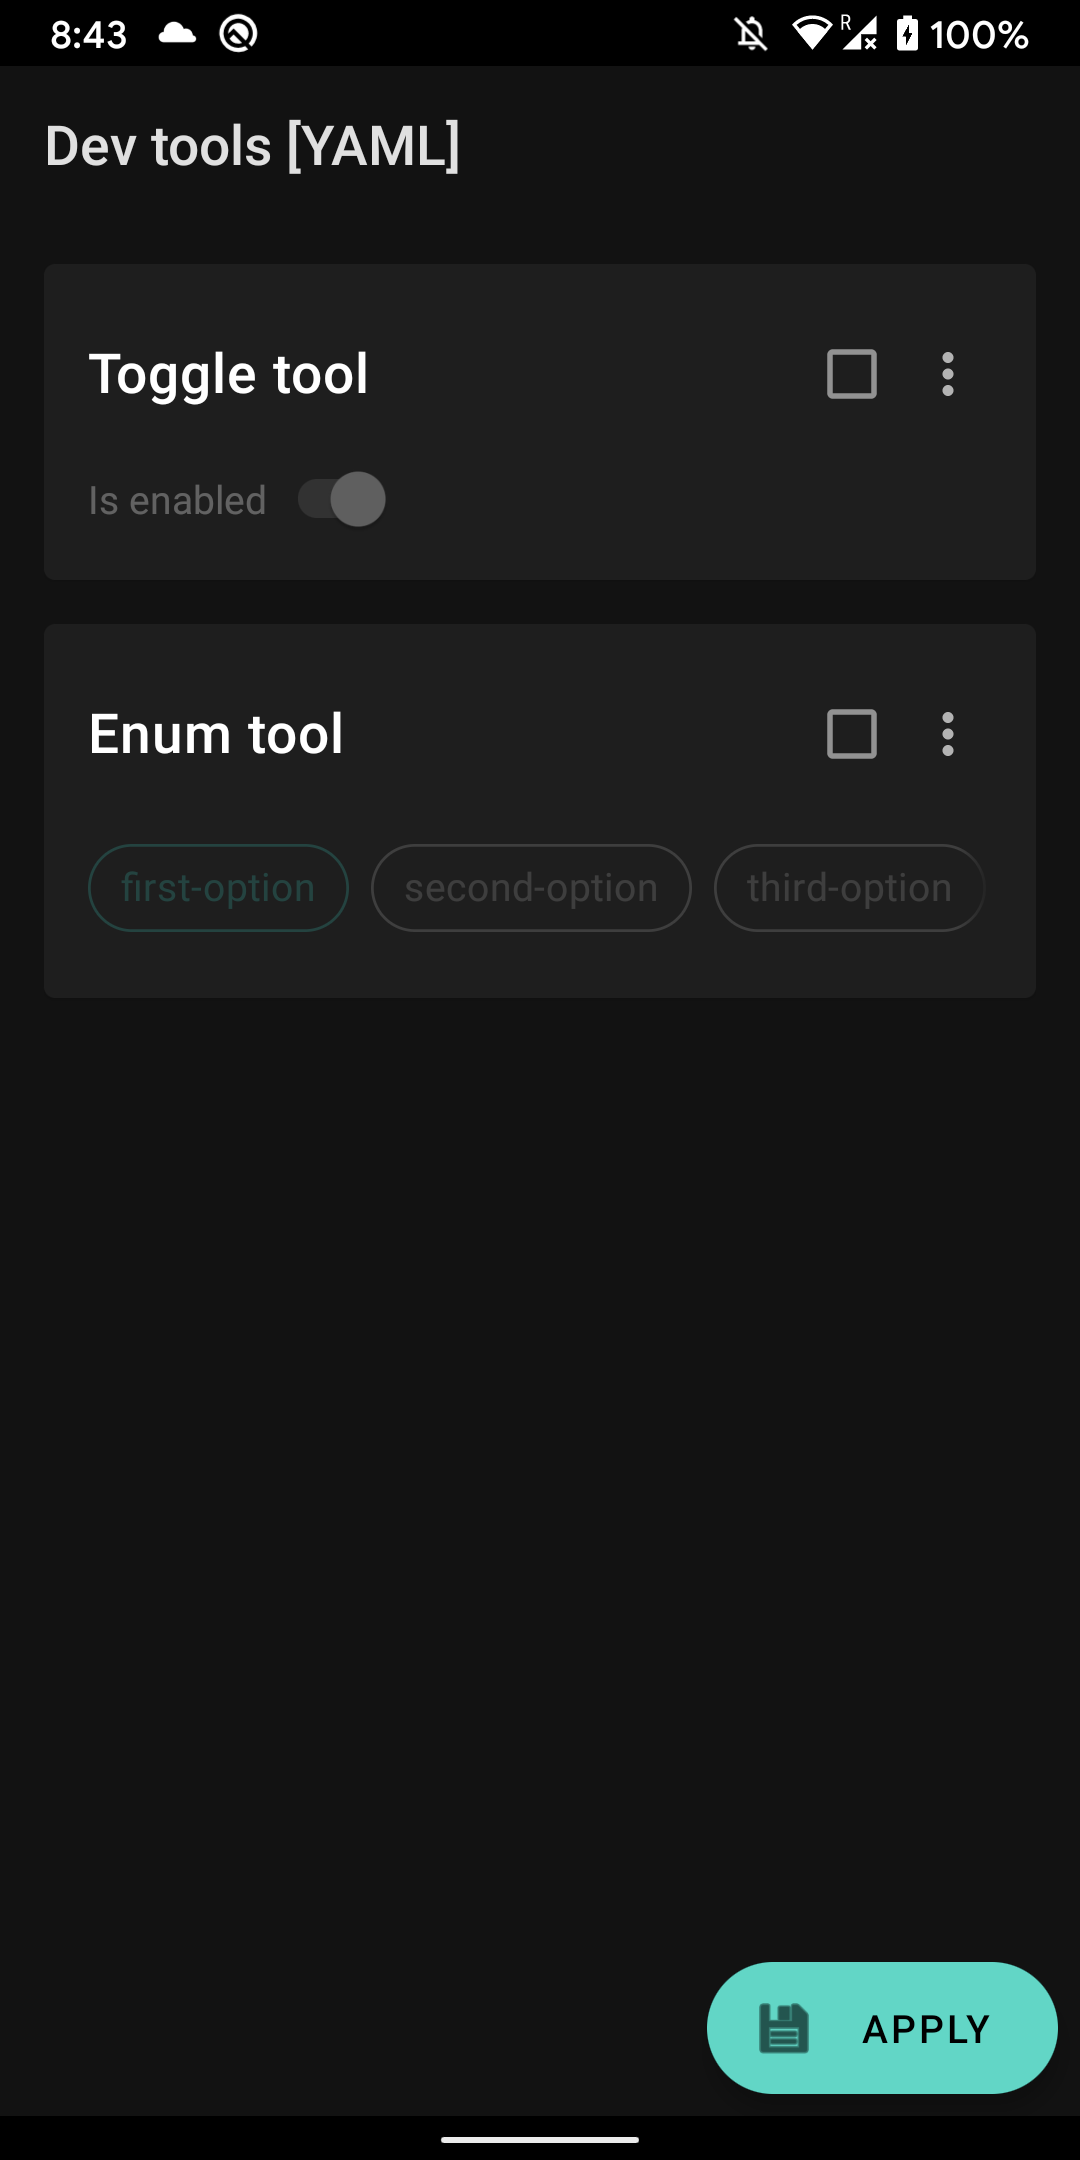
dev-tools.ymlconfiguration file inside your app'sassetsdirectory.toggle-tool: !toggle { title: "Toggle tool", description: "A boolean configuration value tool", canBeDisabled: true, defaultEnabledValue: false, isCritical: true, default: true } enum-tool: !enum { title: "Enum tool", description: "An enum configuration value tool", canBeDisabled: true, defaultEnabledValue: false, isCritical: false, allowCustom: true, defaultValueKey: first-option, options: { first-option: "First Option Value", second-option: "Second Option Value", third-option: "Third Option Value", } }
-
Create a tools source
Before we get to creating the DevTools object, the object which you'll use to interact with the library we need to learn how to create a source for the
dev-tools.ymlconfiguration file we added in the previous step.You can check all configuration sources the library supports at the moment. We need to use the YML one, though.
val source = DevToolsSources.yaml(assets, "dev-tools.yml")
-
Create a dev tools instance
DevTools is the object you'll use to interact with the library from yours app code because it represents the library interface. You'll be able to read, update, and perform many other useful actions with your config using it.
Check out the whole public api for more information.
Most probably, you'll want to reuse this instance inside the whole app, that's why I suggest you wrap it in a custom class just to decouple the library from your project.
I'll place it directly inside the Application class just for the sake of example. This is not the best design, though.
class SampleApplication : Application() {
    lateinit var devtools: DevTools private set

    companion object {
        lateinit var application: SampleApplication
            private set
    }

    override fun onCreate() {
        super.onCreate()
        application = this

        val source = DevToolsSources.yaml(assets, "dev-tools.yml")
        devtools = DevTools.create("DEV_TOOLS", source)
    }
}
-
Add a new configuration activity
One of the easiest ways to update a configuration value is a good user interface. The library can generate one for you using just the
dev-tools.ymlconfiguration file you've provided.You just need to create a separate activity for the configuration screen and open it whenever you need to update your app config.
class DevToolsActivity: AppCompatActivity(), ConfigurationScreenRouter  {
    override fun onCreate(savedInstanceState: Bundle?) {
        super.onCreate(savedInstanceState)

        val contentView = findViewById<ViewGroup>(android.R.id.content)
         DevToolsConfigurationScreen.attachToView(
              rootView = binding.devToolsContainer,
              devTools = devtools,
              configScreenRouter = object : ConfigurationScreenRouter {
                  override var onBack: (() -> Boolean)? = null

                  override fun closeScreen() = finish()
              }
          )
    }
}
You can attach this config screen view to any other view from your app. You can even adjust its theme if you don't like the default one, check out how to do this here.
-
Integrate the startup arguments
You might need to run your app preconfigured. The most common use case would be an automation test, for example. This is also possible, and to make use of this feature, you must integrate it first.
Go to the very first activity to be opened from your app, in my sample, it is called
MainActivityand add the following call.SampleApplication.application.devtools.updateFromBundle(intent.extras)Now you can go and check how to use the startup arguments and start using them.
You've just finished the integration process Now you should be able to update and consume your app config way more comfortable than before.
Just go and open the Configuration activity you've defined, and you should see your configuration screen.
You can also try to update your app config from startup arguments.
adb shell am start --ez toggle-tool false com.maximbircu.devtools/com.maximbircu.devtools.MainActivityYou can use the DevTools instance to access the configuration values of your dev tools.
val value: Boolean = devtools.getValue("toggle-tool")Or to check if your dev tool is enabled
val isEnabled = devtools.isEnabled("toggle-tool")And react on its configuration changes
devtools.onConfigUpdated = { isCriticalUpdate ->
    /* React on configuration changes*/
}